Creating a “head outline” image for team photographs with Fedora and GIMP
Two weeks back, I was in Barcelona for LinuxCon Europe / KVM Forum 2012. While there Jeff Cody acquired a photo of many of the KVM community developers. Although already visible on Google+, along with tags to identify all the faces, I wanted to put up an outline view of the photo too, mostly so that I could then write this blog post describing how to create the head outline :-) The steps on this page were all performed using Fedora 17 and GIMP 2.8.2, but this should work with pretty much every version of GIMP out there since there’s nothing fancy going on.
The master photo
The master photo that we’ll be working with is
Step 1: Edge detect
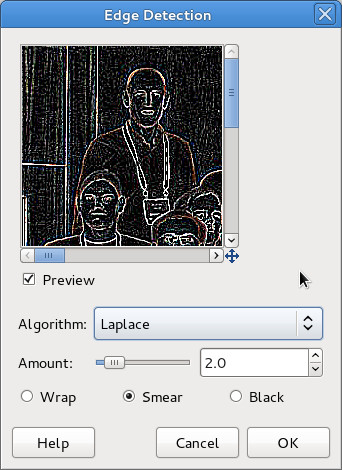
It was thought that one of the edge detection algorithms available in GIMP would be a good basis for providing a head outline. After a little trial & error, I picked ‘Filters -> Edge-detect -> Edge..’, then chose the ‘Laplace’ algorithm.
This resulted in the following image
Step 2: Invert colours
The previous image shows the outlines quite effectively, but my desire is for a primarily white image, with black outlines. This is easily achieved using the menu option ‘Colours -> Invert’
Step 3: Desaturate
The edge detection algorithm leaves some colour artifacts in the images, which are trivially dealt with by desaturating the image using ‘Colours -> Desaturate…’ and any one of the desaturation algorithms GIMP offers.
Step 4: Boost contrast
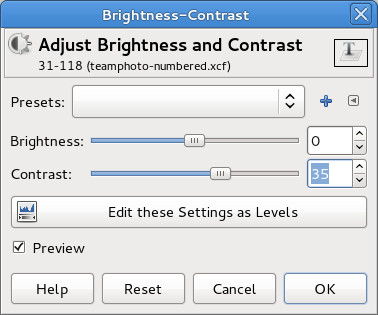
The outline looks pretty good, but there is still a fair amount of fine detail “noise”. There are a few ways we might get rid of this – in particular some of GIMPs noise removal filters. I went for the easy option of simply boosting the overall image contrast, using ‘Colours -> Brightness/Contrast…’
For this image, setting the contrast to ’40’ worked well, vary according to the particular characteristics of the image
Step 5: Add numbers
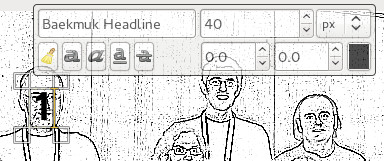
The outline view is where we want to be, but the whole point of the exercise is to make it easy to put names to faces. Thus the final step is to simply number each head. GIMP’s text tool is the perfect way to do this, just click on each face in turn and type in a number.
No need to worry about perfect placement, since each piece of text becomes a new layer. Once done, the layer positions can be moved around to fit well.
And that’s the final image completed. In the page I created on the KVM website, a little javascript handled swapping between the original & outline views on mouse over, but that’s all there is to it. The hardest part of the whole exercise is actually remembering who everyone is :-P


Thanks for the write up on the technique. I was wondering how you had done this in the past.
From a usability perspective, it would be great to pair it with an HTML map. Ideally, you would get the name from mousing over the user. I wonder if the gimp has something that would help you there, based on the number in the text field, that could generate an empty map?
I had completely forgotten about HTML image maps. GIMP does in fact have support for creating them – ‘Filters -> Web -> Image map’.
you bet me on suggesting the image map part :)